
When I learned how to make 3D peyote circles, I started using the same method to bead around hoop earrings. (Later, I found out that many others were already doing the same, so it wasn’t my original idea.)
If you're not making a full circle, you can think of this as flat peyote stitch using different-sized beads. I use two needles—two for even-count peyote, and four for odd-count because I double the thread—but you can stitch however you prefer.
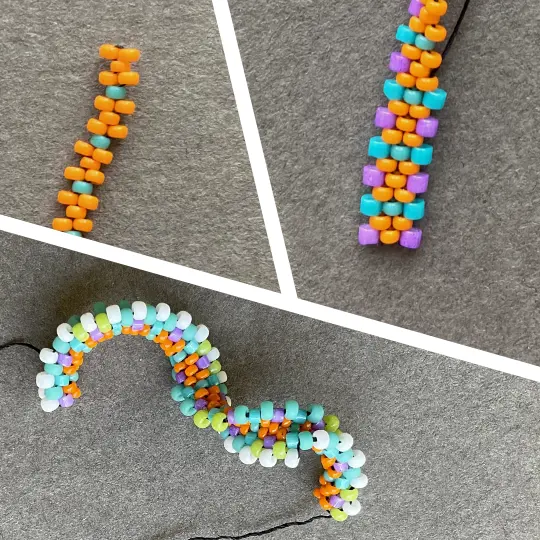
The method is simple: start from the middle of the pattern with the smallest beads, stitch in both directions using the two ends of the thread, wrap the beadwork around the hoop, and zip up the two sides.
The number of columns depends on the hoop’s diameter (and how much space you leave for the earring opening). The number of rows depends on the hoop’s thickness. For standard-thickness hoops, 7 rows are usually enough.
I’ve also added this technique to the web app. You can calculate the number of columns and design your pattern there. I wanted to share how I do it here, along with diagrams and a few helpful tips.
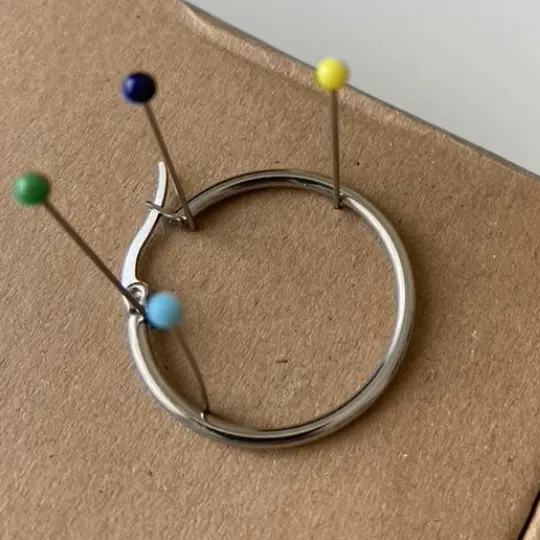
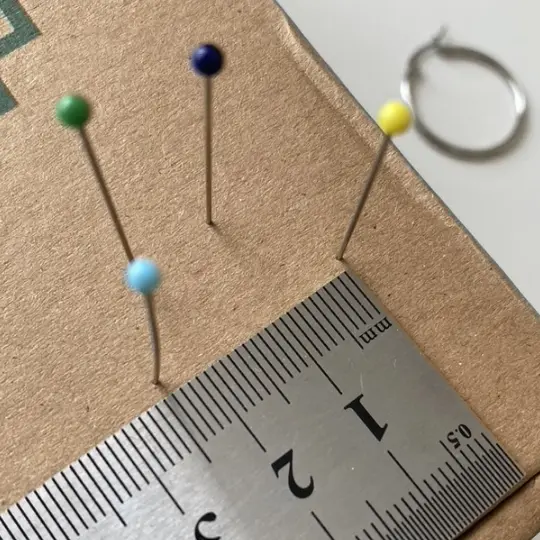
Calculate the number of columns by measuring the inner diameter of the hoop and the space you want to leave for the earring opening. (I mark these points with a needle, as shown in the picture. It’s a good idea to leave a small margin of error for the opening distance, as the app gives approximate measurements.)
If your design doesn’t need to be perfectly symmetrical, I recommend using the even-count peyote technique (which requires an even number of columns).
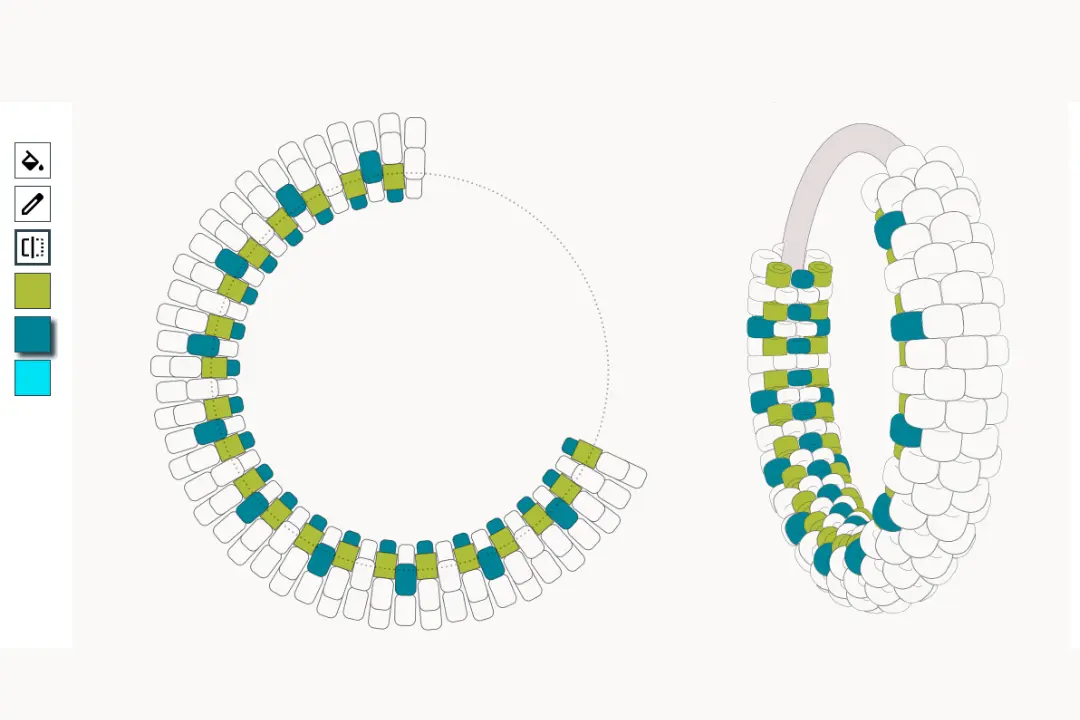
In this method, the first two rows in the center use the smallest beads, and the bead size increases toward the outside. However, in the diagrams below, all beads are drawn with the same width to keep things neat. (When larger beads are placed between the smaller center beads, the beadwork begins to curl. This effect is hard to show in a flat diagram. In the app, beads are shown in their actual sizes and shapes.)
The dashed line in the diagrams marks the center of the pattern.
Cut a piece of thread as long as needed for your pattern. Thread a needle onto each end and find the midpoint of the thread. (In the diagrams, Needles A and B are shown in different colors for clarity.)
Pick up the beads for the first row and second row (on Side A) together, slide them to the middle of the thread. Then, use Needle B to add the second row on Side B.
After completing the second row on both sides, make sure the needles are pointing in the same direction, and the thread is even on both sides.
From here, continue stitching even-count peyote on both sides of the pattern using Needle A and B. Only the first and last rows are single rows—the other rows are added symmetrically on Side A and Side B.
As you work, the beadwork will begin to curl.The last row is added on one side only (it doesn’t matter which side).
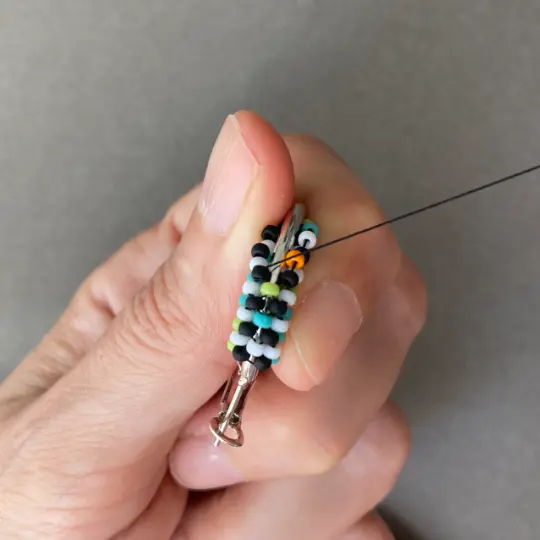
After the final row, wrap the beadwork around the hoop and start zipping up the two sides.
Use both thread ends to go back and forth, placing the beads of the last row neatly between the two sides. Tie knots at the turns and between beads to secure your work.
If you haven't tried this model before, I recommend learning the full-circle 3D peyote technique first. You can find the link to the video I learned from below.
The application currently includes only three bead group options that I’ve tested. I’ve also shared the drawing I use to get a different perspective on how the design will look. Adapting the 3D model I created in Blender to the app is quite difficult, so it’s not possible to generate a 3D image for every variation. For now, there’s only one sample image: it shows a 7-row pattern using Bead Group 1 and displays up to 42 columns.
Designing just by looking at the flat plan can be challenging. I hope this drawing gives you a rough idea of how the pattern might look in three dimensions, especially when experimenting with different color combinations.Design your patterns with boncuk.app!If you share the types of beads you use or any feedback, I’ll try to include them in future versions.